Did you know that making your online checkout process easy and convenient is crucial for your e-commerce business? Your customers want a hassle-free checkout experience when they purchase online, and having a long and complicated checkout process can make them abandon their shopping cart.
That’s why WooCommerce One Page Checkout is becoming more and more popular among online retailers. With it, you can reduce the steps needed to complete a purchase, boosting your conversion rates and increasing your sales. It’s a win-win situation!
In a hurry? Skip to...
What is WooCommerce One Page Checkout?
Woocommerce One page checkout, also known as WooCommerce single page checkout or WooCommerce one page checkout is a type of checkout process designed to simplify the checkout experience for customers by presenting all necessary information and options on a single page. This process eliminates customers’ need to navigate multiple pages, reducing the likelihood of abandonment and improving conversion rates.
In a traditional checkout process, customers are typically presented with several different pages requiring them to enter various information, such as shipping address, billing information, and payment details. This can be time-consuming and confusing for customers, leading to increased cart abandonment rates.
On the other hand, one page checkout condenses all of these steps onto a single page. Customers can enter their shipping and billing information, select their preferred shipping method, and enter their payment details on one screen.

How WooCommerce One Page Checkout Boosts Conversions
It’s interesting to note that many people abandon their online shopping carts. Research by Baymard Institute shows that out of every 100 people who add items to their cart, roughly only about 30 will end up completing the checkout process. That’s a lot of missed opportunities for both shoppers and online stores.
Elasticpath conducted an A/B testing, and the findings were truly remarkable. They discovered that implementing a single page checkout can significantly reduce cart abandonment by up to 21.8%. Customers are more likely to complete their purchases without frustration or confusion. What a small change can do to improve the shopping experience is incredible.
Upon careful examination of the data, it becomes clear that a one page checkout option performs better on the mobile platform. Given the current trend of mobile usage in e-commerce, I firmly believe that most WooCommerce stores would benefit from implementing one page checkouts.
Here are a few reasons why WooCommerce one page checkouts work:
Reduced Friction
By streamlining the checkout process into a one page checkout, we eliminate the need for customers to navigate back and forth between pages, which can often lead to frustration and cart abandonment. This way, we can ensure that our customers have a hassle-free shopping experience and are more likely to complete their purchases.
Increased Convenience
WooCommerce single page checkout prioritizes our customers’ satisfaction by ensuring they can quickly complete their purchase in just one step. This is particularly important for mobile shoppers, who may feel discouraged if the checkout process is complicated.
Decreased Frustrations
Instead of navigating multiple pages and filling out numerous fields, customers can complete their purchases quickly and easily on a single page. This reduces the likelihood of customers abandoning their purchase due to frustration.
How to Set Up WooCommerce One Page Checkout
Now that we have explored how WooCommerce one page checkouts can benefit you, let’s look at how you can incorporate them into your website. There are three simple ways to achieve this:
Using a Plugin
One of the easiest ways to add a one page checkout is through a WooCommerce one page checkout plugin. Lucky for you, there are several WooCommerce checkout plugins available that can help you achieve this. Here are my top three picks:
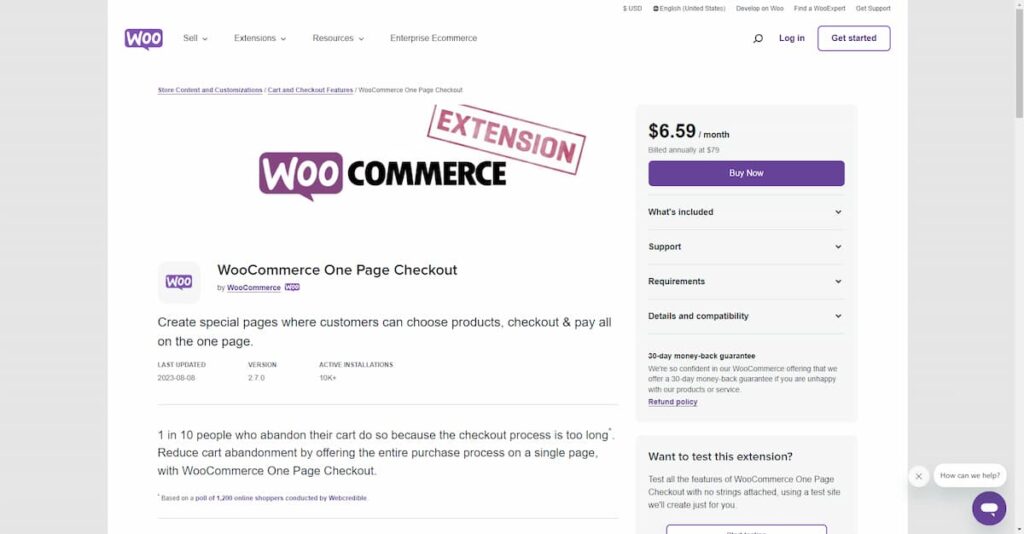
WooCommerce One Page Checkout
I highly recommend using WooCommerce One Page Checkout as it is the best extension for turning your multi-page WooCommerce checkout into one page. This extension, created by WooCommerce themselves, allows you to transform any page into a checkout page and create custom checkout pages that show the checkout form directly on the product page.
Customers will never have to leave the product page to checkout. All product selection and payment information can be handled on the same page. You also have the option to display checkout forms on custom landing pages. Available for only $79 per year, it is worth the investment.
Yith WooCommerce One-Click Checkout
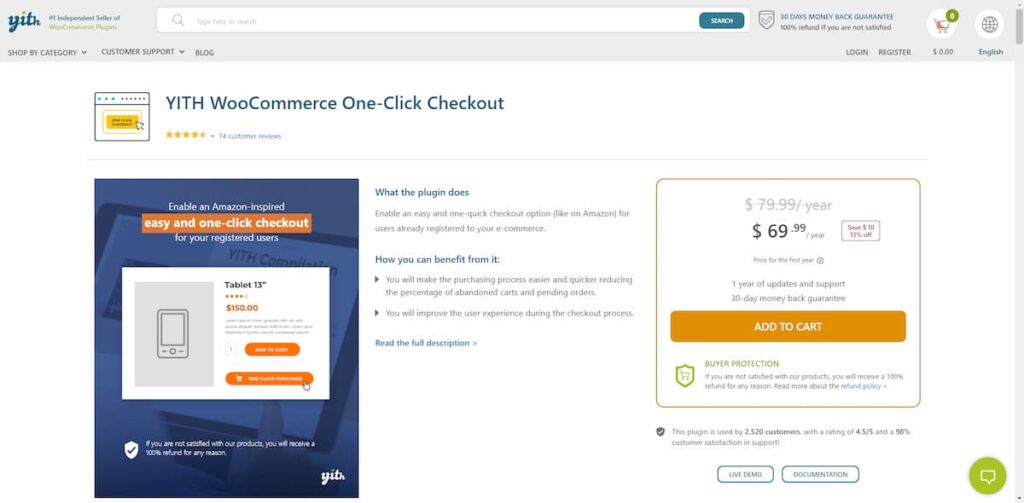
Yith WooCommerce One-Click Checkout is a fantastic option for anyone looking to speed up their checkout process and reduce abandoned carts. You can customize the checkout experience by choosing custom colors and button labels. Plus, with the added option to purchase directly from the product page, your customers will love the convenience. The plugin is available for only $69.99 annually.
Direct Checkout for WooCommerce
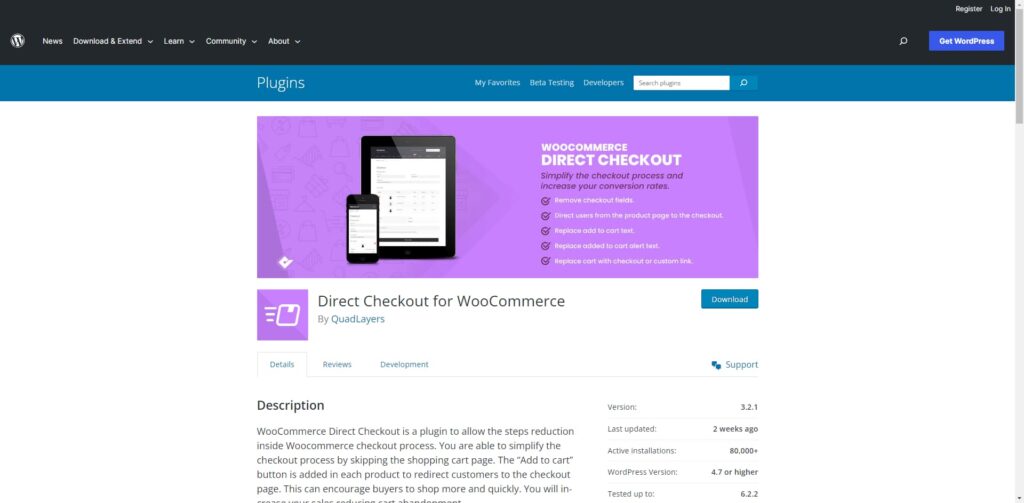
With Direct Checkout for WooCommerce, you can eliminate the shopping cart page and take your customers directly to the checkout page. This means fewer steps for your customers and a smoother checkout experience. Plus, you can customize the checkout fields to suit your needs.
While the free version of the plugin is a great start, it doesn’t offer one page checkout as a feature. You’ll need to upgrade to the premium version to get access to this and other premium features. The pricing is very reasonable, starting at just $30 for a single site license.
Using your page builder
Nowadays, many page builders offer the ability to build or customize your cart and checkout pages. I’m using Elementor for demonstration purposes, but you should be able to adapt this for your page builder quickly.
N.B.: It goes without saying, but you can only do this with Elementor Pro as most features we’d require here only comes with Elementor Pro.
You’ll need to redirect the cart page to the checkout page to get started. There are a few simple ways to do this, such as using a plugin like 301 Redirects – Easy Redirect Manager or most SEO plugins with an inbuilt redirect manager. If you don’t shy away from getting your hands on code, you can also add the following code to your child theme’s functions.php file (or use the Code Snippets plugin):
function redirect_page() {

     if (isset($_SERVER['HTTPS']) &&
        ($_SERVER['HTTPS'] == 'on' || $_SERVER['HTTPS'] == 1) ||
        isset($_SERVER['HTTP_X_FORWARDED_PROTO']) &&
        $_SERVER['HTTP_X_FORWARDED_PROTO'] == 'https') {
        $protocol = 'https://';
        }
        else {
        $protocol = 'http://';
    }

    $currenturl = $protocol . $_SERVER['HTTP_HOST'] . $_SERVER['REQUEST_URI'];
    $currenturl_relative = wp_make_link_relative($currenturl);

    switch ($currenturl_relative) {

        case '[from slug]':
            $urlto = home_url('[to slug]');
            break;

        default:
            return;

    }

    if ($currenturl != $urlto)
        exit( wp_redirect( $urlto ) );


}
add_action( 'template_redirect', 'redirect_page' );
Moving on, ensure you have the “Flexbox container” and “Nested Elements” activated in Elementor’s Settings → Features tab.
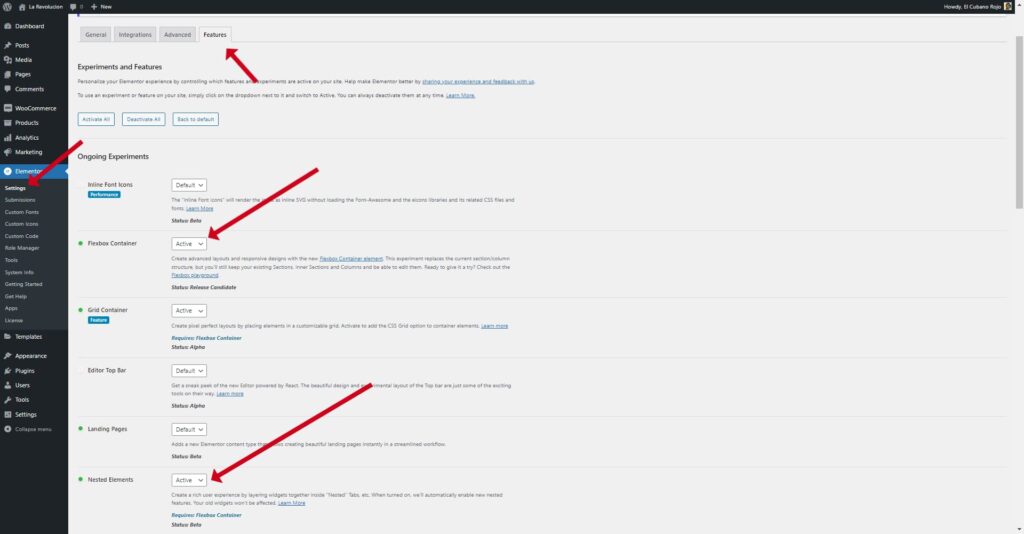
To customize the checkout page with Elementor, head over to the page and click the “Edit” button. After that, click “Edit with Elementor,” you’ll have more control over the page aspects as Elementor would “convert” this page into an Elementor template. You may skip this step if you already edit your Checkout page with Elementor.
When the Elementor Editor loads, delete all the existing shortcodes or text editors on this page.
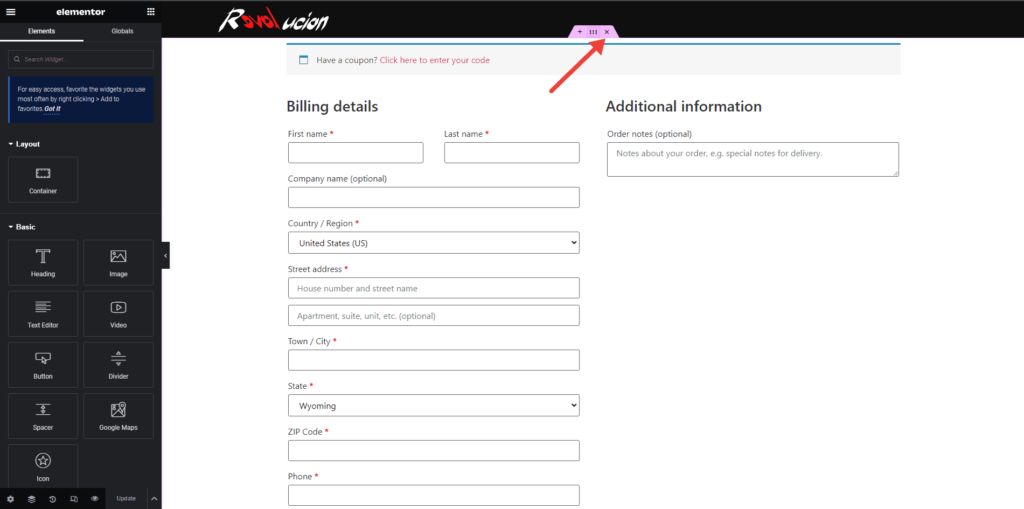
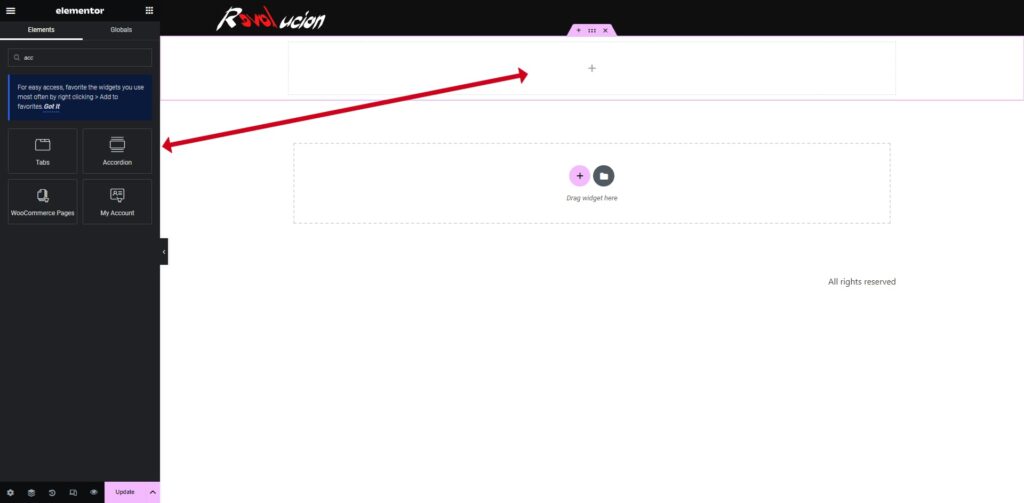
Once you’re done, add an accordion element to this container. Just keep one item in the accordion item and eliminate the rest. I will name this item “Cart” and change the icons. You may choose to call it whatever you like. And then, I will drag the Cart element into this accordion.
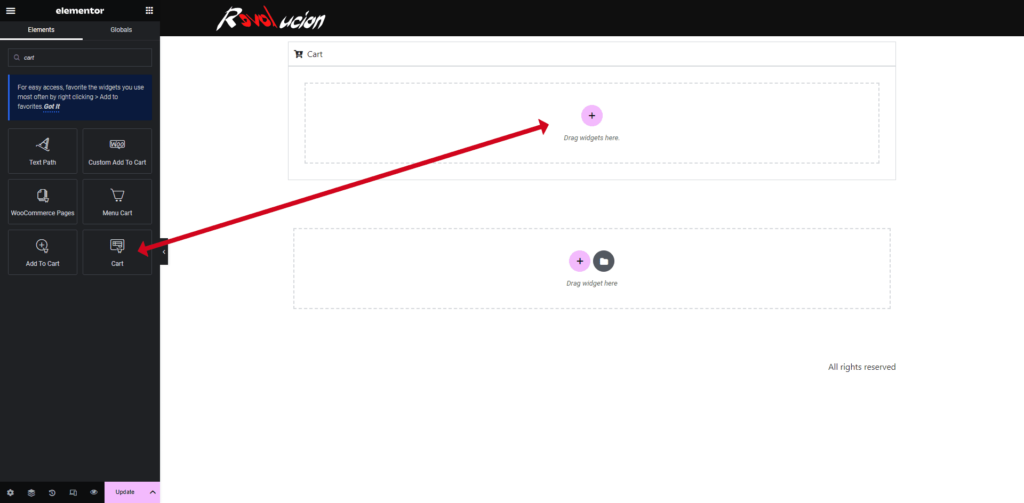
To ensure you can see the cart element after dragging it, try adding something to your cart and then reloading the page. I will change the layout to one column. After that, feel free to change the colors and styles to match your branding. You’ll notice a Cart Total section with a big Proceed to Checkout button, but since we’re combining the cart and checkout pages, we will hide this section using CSS.
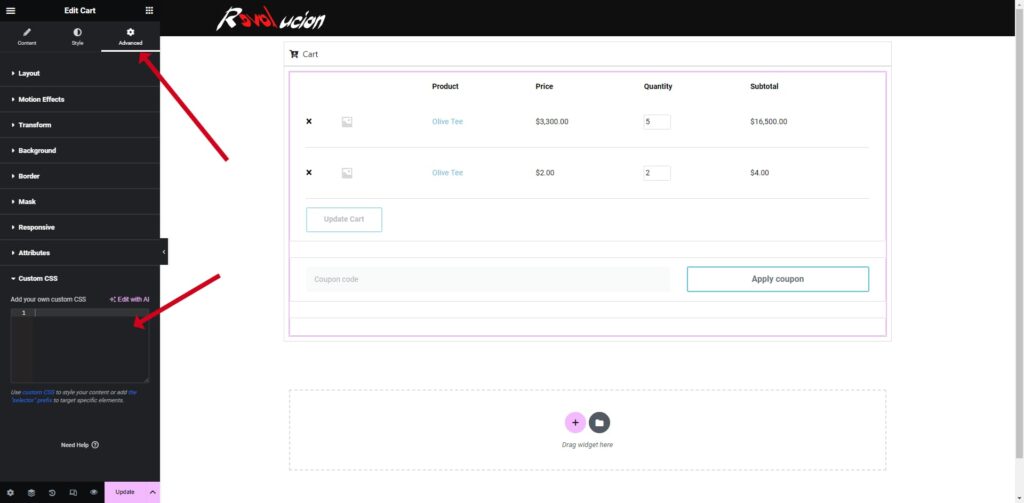
Paste the following code the Cart element → Advanced → Custom CSS:
.e-cart-totals.e-cart-section {
    display: none;
}
To complete the process, all you need to do is add the checkout element, customize it, and hit publish. By doing this, we were able to set up the WooCommerce checkout and cart page into one with Elementor, which will make the checkout experience for your users much smoother.
Using custom code
Using custom code for setting up your one page checkout can let you build your WooCommerce one page checkout without plugins. However, I recommend only doing this if you have experience navigating and editing theme files. If you’re uncomfortable with this, it’s always a good idea to enlist the help of a designer.
All of these codes would go in the functions.php file of your child theme. Alternatively, you can use a Code Snippets plugin.
This code snippet will let WooCommerce know that we’d like to display the cart table above the checkout form:
add_action( 'woocommerce_before_checkout_form', 'one_page_checkout', 11 );

function one_page_checkout() {
   echo do_shortcode( '[woocommerce_cart]' );
}
This code snippet will automatically hide redundant sections for you. Next up, you wouldn’t need to deactivate the WooCommerce cart from WooCommerce → Settings → Advanced → clicking the small cross on the cart dropdown. And that’s all you need to do!
Best Practices for Using WooCommerce One Page Checkout
We have now implemented one page checkout on our online store. However, following best practices for using WooCommerce One Page Checkout is essential to maximize this feature. This section explores the best practices for getting the most out of this powerful technique.
Keep the form simple
Consider only asking for the essentials like your customer’s name, email, shipping address, and payment info. Removing billing/shipping address fields is better if you sell digital products. The fewer steps, the better! However, if you genuinely require a lot of fields, it is better to stick to a multi-page checkout, as cramming in too many fields can affect your conversions too.
Use simple language
It’s imperative to ensure that your checkout fields are easy to understand for your customers. Try to use simple language that anyone can understand, and avoid using technical terms or jargon.
Use Visual aids
Adding visual cues such as arrows, images, and progress bars can make it easier for your customers to find the correct fields and stay on track while checking out, boosting their chances of completing the process.
Use AJAX
AJAX add cart button Checkout pages powered by AJAX let you update your billing and shipping info without leaving the page. It’s a convenient and efficient way to complete your checkout while avoiding errors.
Offer multiple payment options
To prevent abandonment, it’s important to provide several payment options. Accept credit card payments, debit cards, PayPal, and other popular methods. This way, customers can choose the payment method that works best for them.
Display costs upfront
It’s essential to show all costs upfront when using a one page checkout. This helps customers know what they’re paying for and avoid displeasing surprises. Displaying prices transparently can also help build customer trust, leading to repeat business.
Personalize the experience
Why not use your customer’s data to personalize the checkout experience? This way, you can cater to their shipping address or previous purchase history and make their checkout process more seamless and enjoyable! Moreover, you can use their first names and show the amounts in their local currency, among others, to personalize it further.
Make the checkout process mobile-friendly
An ever-increasing number of people are now shopping online from their mobile devices. It’s essential to ensure that your checkout process is optimized for mobile devices so customers can quickly check out on their phones or tablets.
Show Trust Signals
Including trust signals like security badges and customer testimonials can help your customers trust your business and feel more comfortable purchasing.
Conclusion
In conclusion, WooCommerce One Page Checkout is a powerful technique that can help you maximize your sales. As supported by multiple research, streamlining the checkout process and eliminating unnecessary steps can reduce cart abandonment and boost conversion rates.
But WooCommerce One Page Checkout is more than just a time-saving approach. It also provides you with valuable insights into your customers’ behavior. You can identify areas to improve your store’s user experience by tracking cart abandonment and conversion data. This can help you make informed decisions about optimizing your checkout process and improving your sales performance.
Ultimately, WooCommerce One Page Checkout is a must-have approach for any online store looking to maximize sales. By simplifying and streamlining the checkout process, you can improve your overall user experience.

